
Introduction
Adding new users to your Leadnodes environment is a critical administrative task that ensures your team members have the correct access rights and permissions. Whether you are onboarding a new employee, a lead buyer, or a system administrator: understanding the different account types and grouping options is essential for maintaining a secure and organized workflow.
By following this process, you will go through the complete setup – from selecting the appropriate user role and defining profile details to generating secure credentials. This foundational setup allows you to tailor the platform's functionality to specific user needs while keeping your user management clean and efficient.
Configuring Account Types and Permissions
Before entering individual details, you must first define the scope of the user's access. This configuration ensures that each team member only interacts with the platform in a manner that corresponds to their role.
Selecting an Account Type
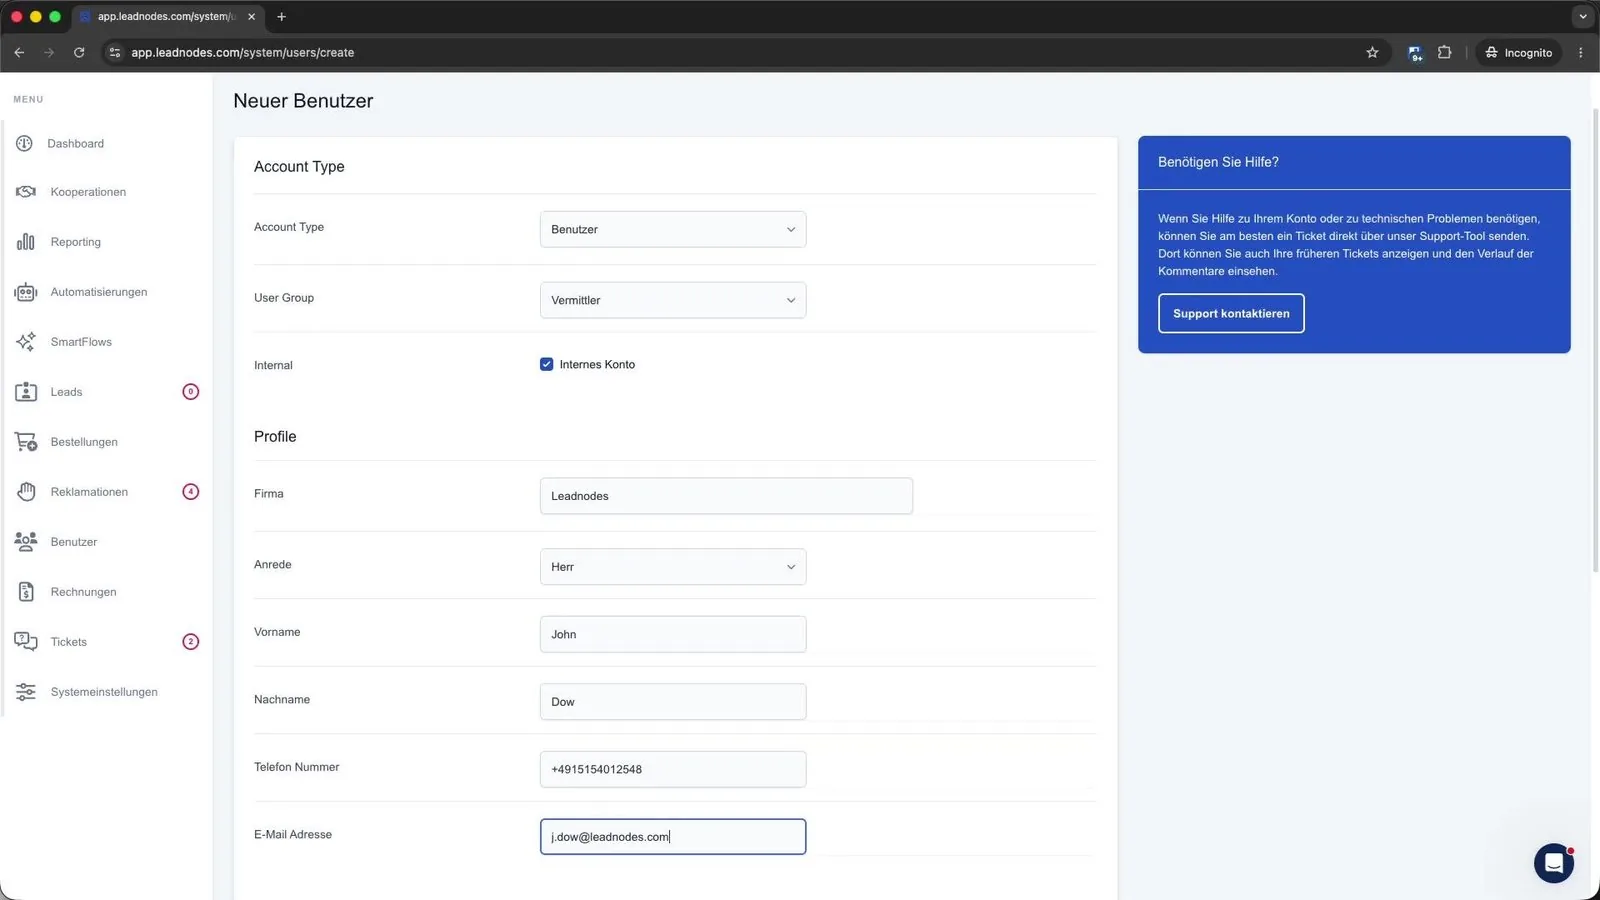
Selecting the account type is the most critical setting during user creation. Leadnodes offers three primary tiers, each tailored to different operational requirements:
- Standard User (Standard-Benutzer): This is the default selection for external partners such as lead buyers or suppliers.
- Call Center User (Callcenter-Benutzer): Use this type if the user needs to qualify leads or handle complaints directly within their own dedicated Leadnodes account.
- Co-Admin: Select this option for trusted team members who require administrative privileges nearly identical to your own to assist with system management.
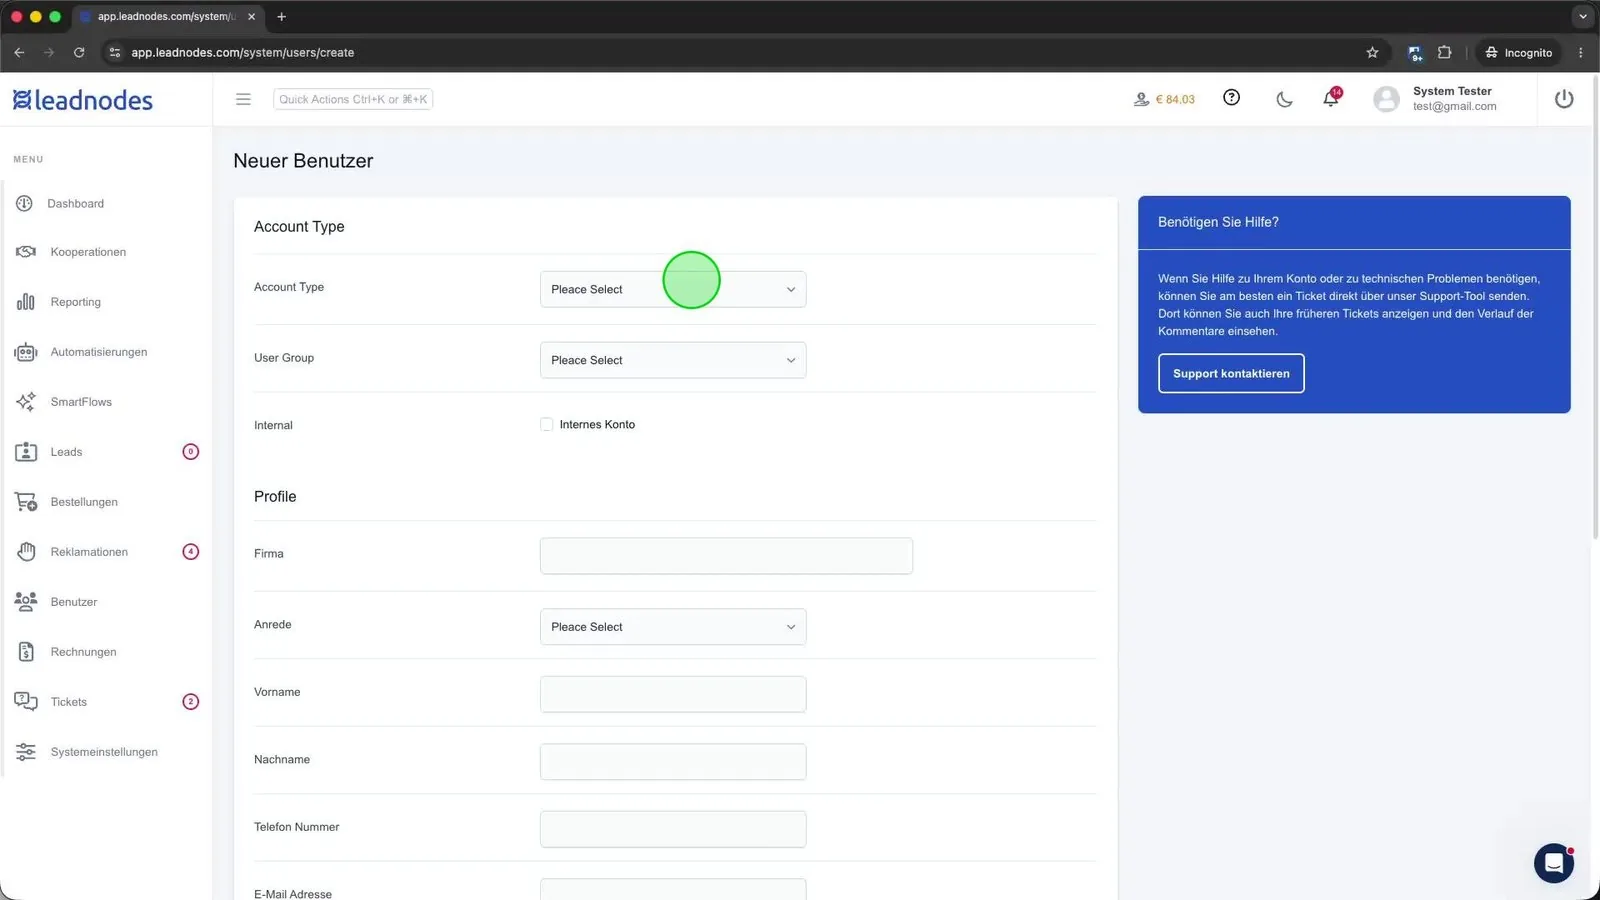
💡 Tipp: When in doubt, you should start with the Standard User role, unless administrative or call center functionalities are explicitly required.
Assigning User Groups
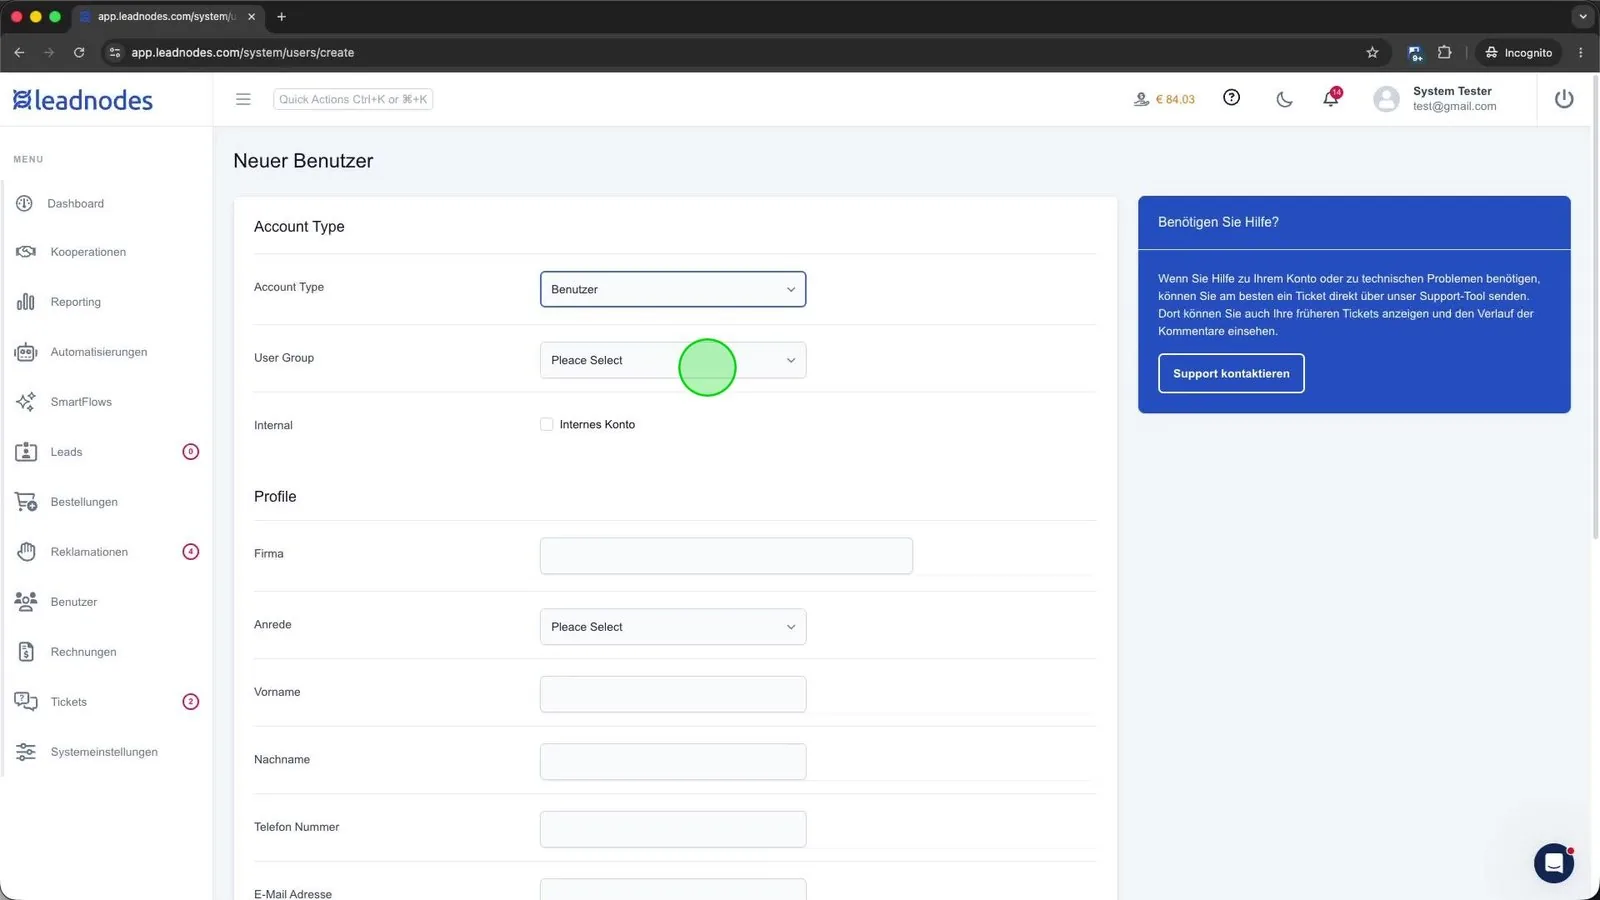
Once the account type is established, you must assign the user to a User Group. These groups function as organizational containers that help keep your user list structured and easily manageable as your team grows.
If you find that your current groups do not fit the new user's role, you can easily define new ones by navigating to the System Settings and opening the User Groups section. Proper grouping ensures that permissions and reporting remain consistent across all members of a department.
Setting the Internal Account Status
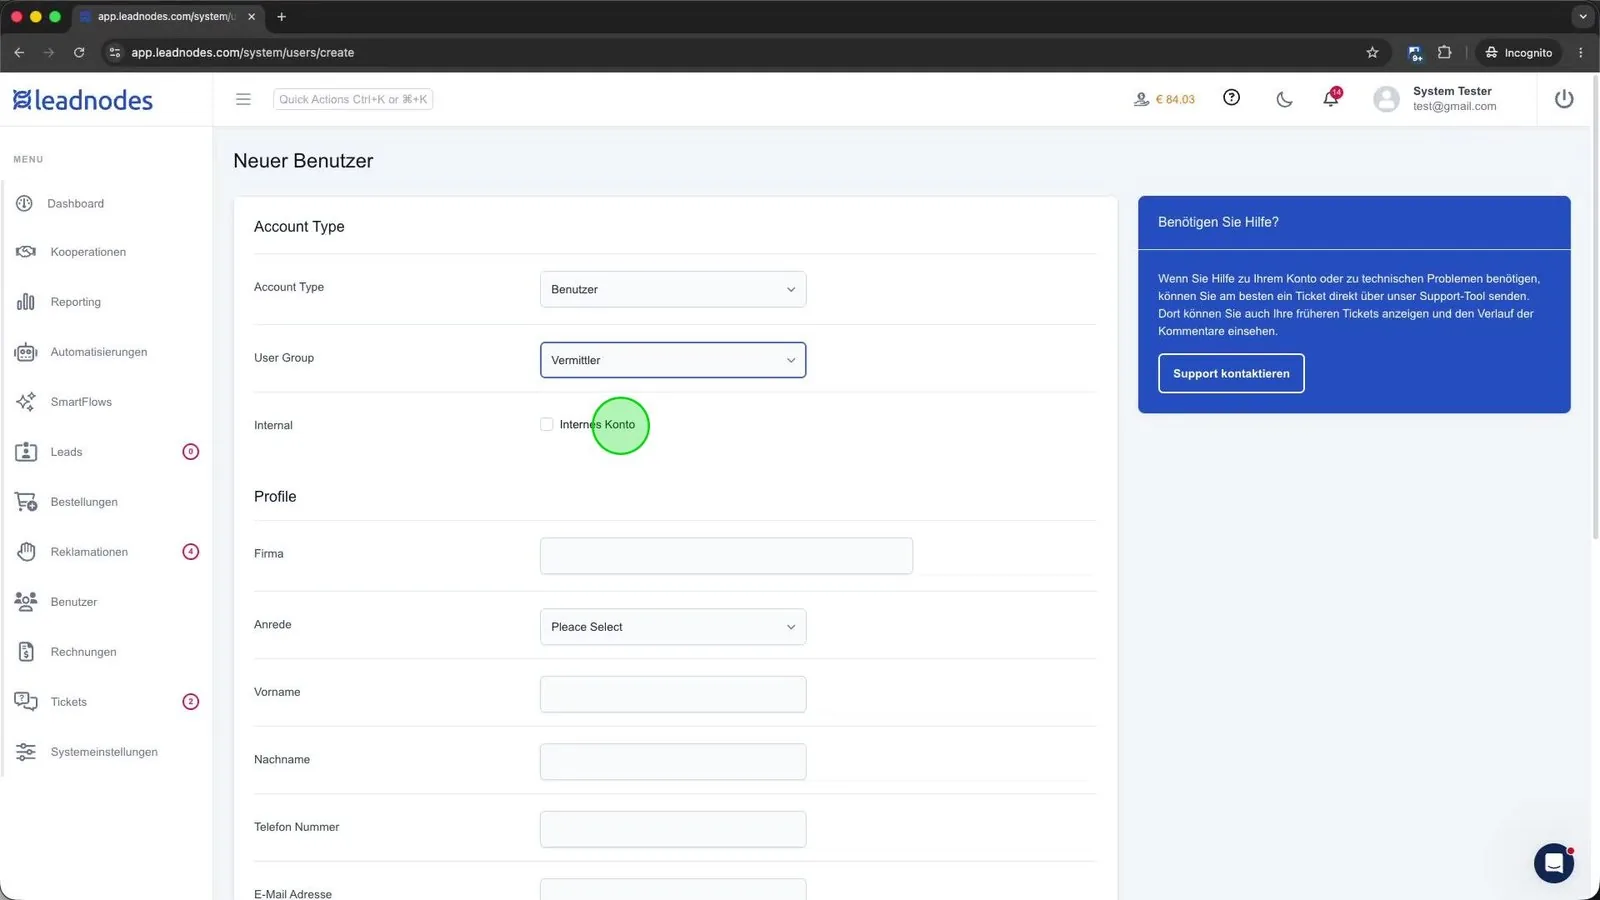
The Internal Account toggle is a simple yet powerful setting that controls how the system handles billing for this specific user. When you activate this checkbox, the system marks the user as "internal."
This is particularly useful for in-house employees who should not generate billing line items for the leads they process. By turning it on, you avoid unnecessary invoicing overhead for your own team members, while leaving it deactivated triggers the standard billing workflow used for external clients.
Managing User Profile Information
In the Profile section, you establish the user's identity within your system. Accurate information at this stage is important for communication, system logs, and general account management.
Entering Personal Details
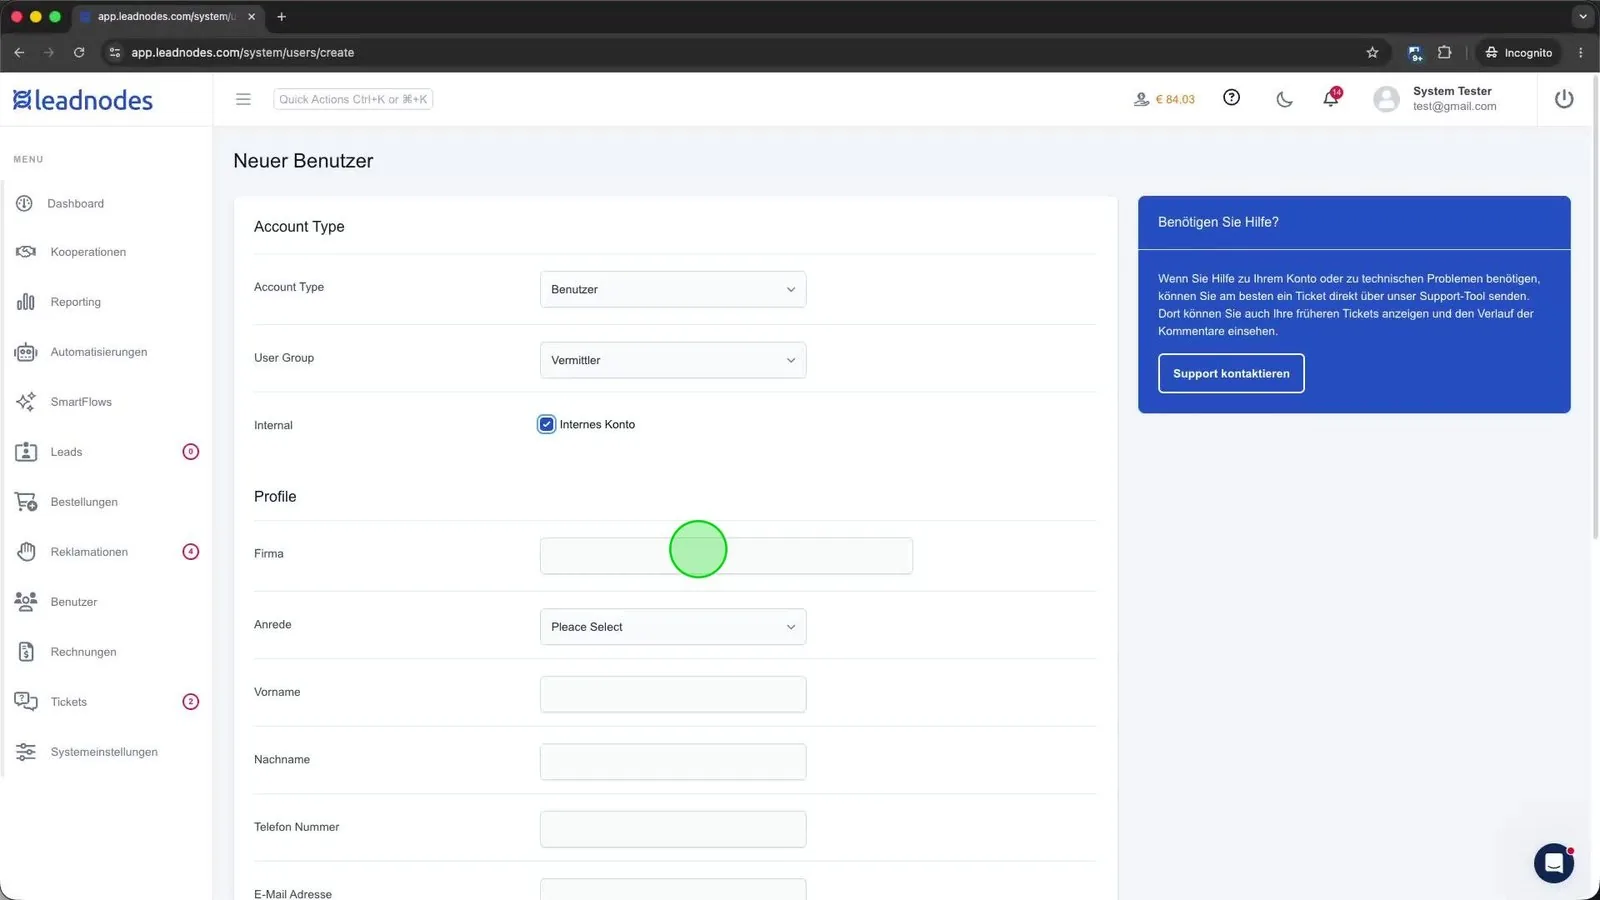
In the Profile area, you enter the core identification data for the user. This includes the company name (Firma), which helps map users to their respective business units, and the salutation (Anrede), which ensures correct addressing in automated system emails. Providing these details correctly ensures that your records are clean and professional from the start.
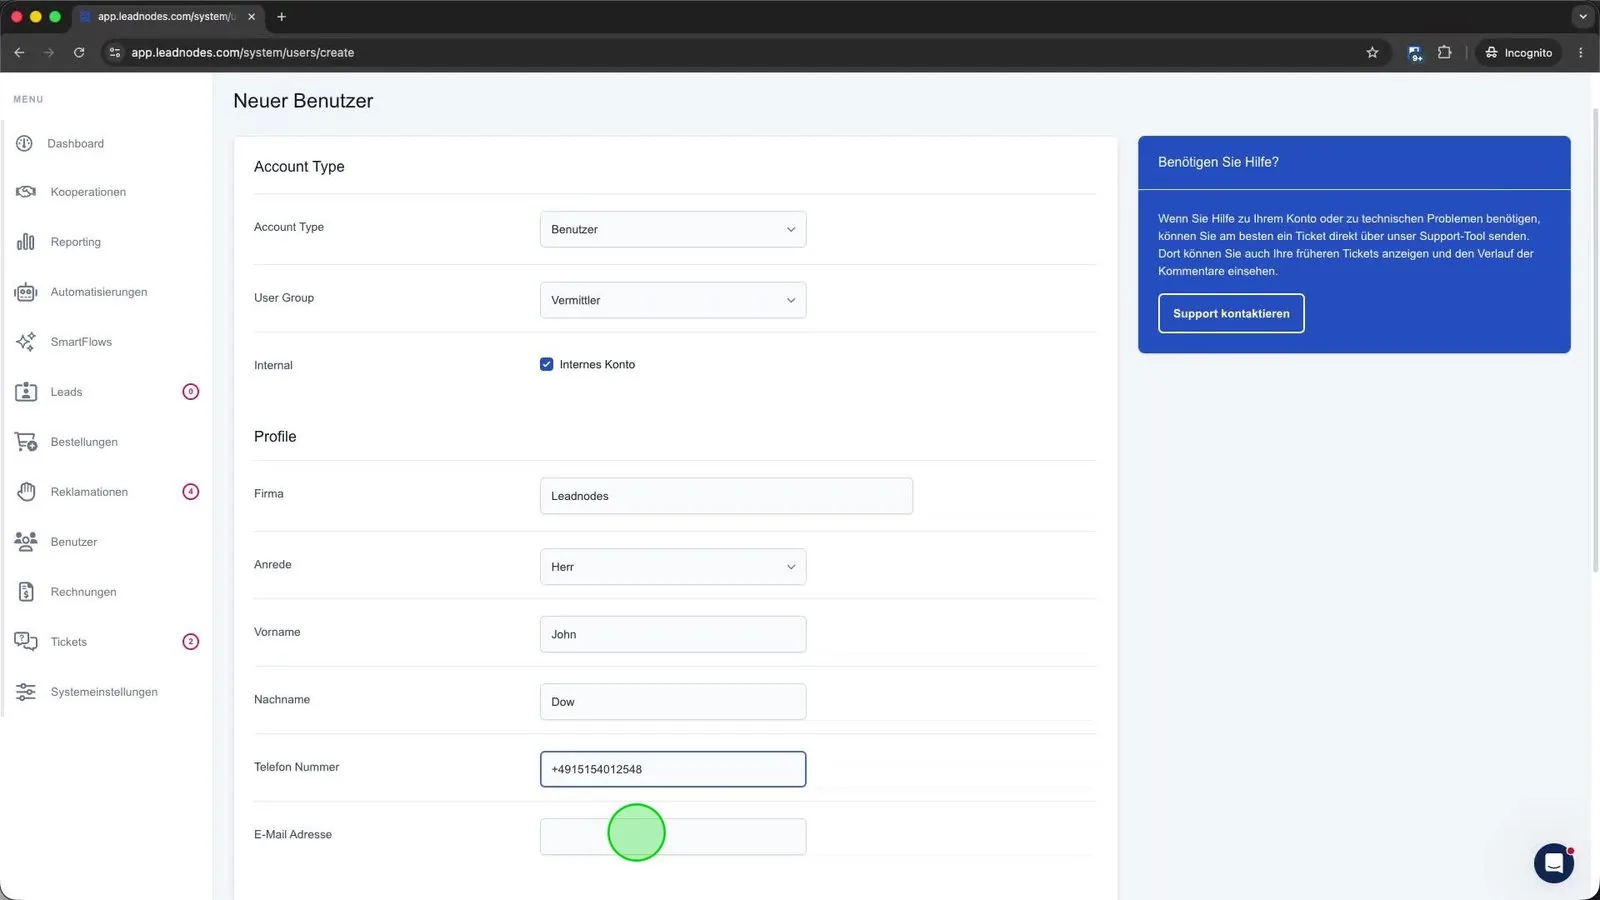
Next, you need to enter the user's first name (Vorname) and last name (Nachname). Once these fields are filled in, please also provide their direct phone number and email address. These contact methods are frequently used by the system for notifications and administrative alerts.
Verifying Contact Information
The accuracy of the email address is particularly important. Leadnodes utilizes this for system communication. Before finishing, double-check exactly that it is spelled correctly, as typos can later lead to delivery issues with automated password resets or system notifications.
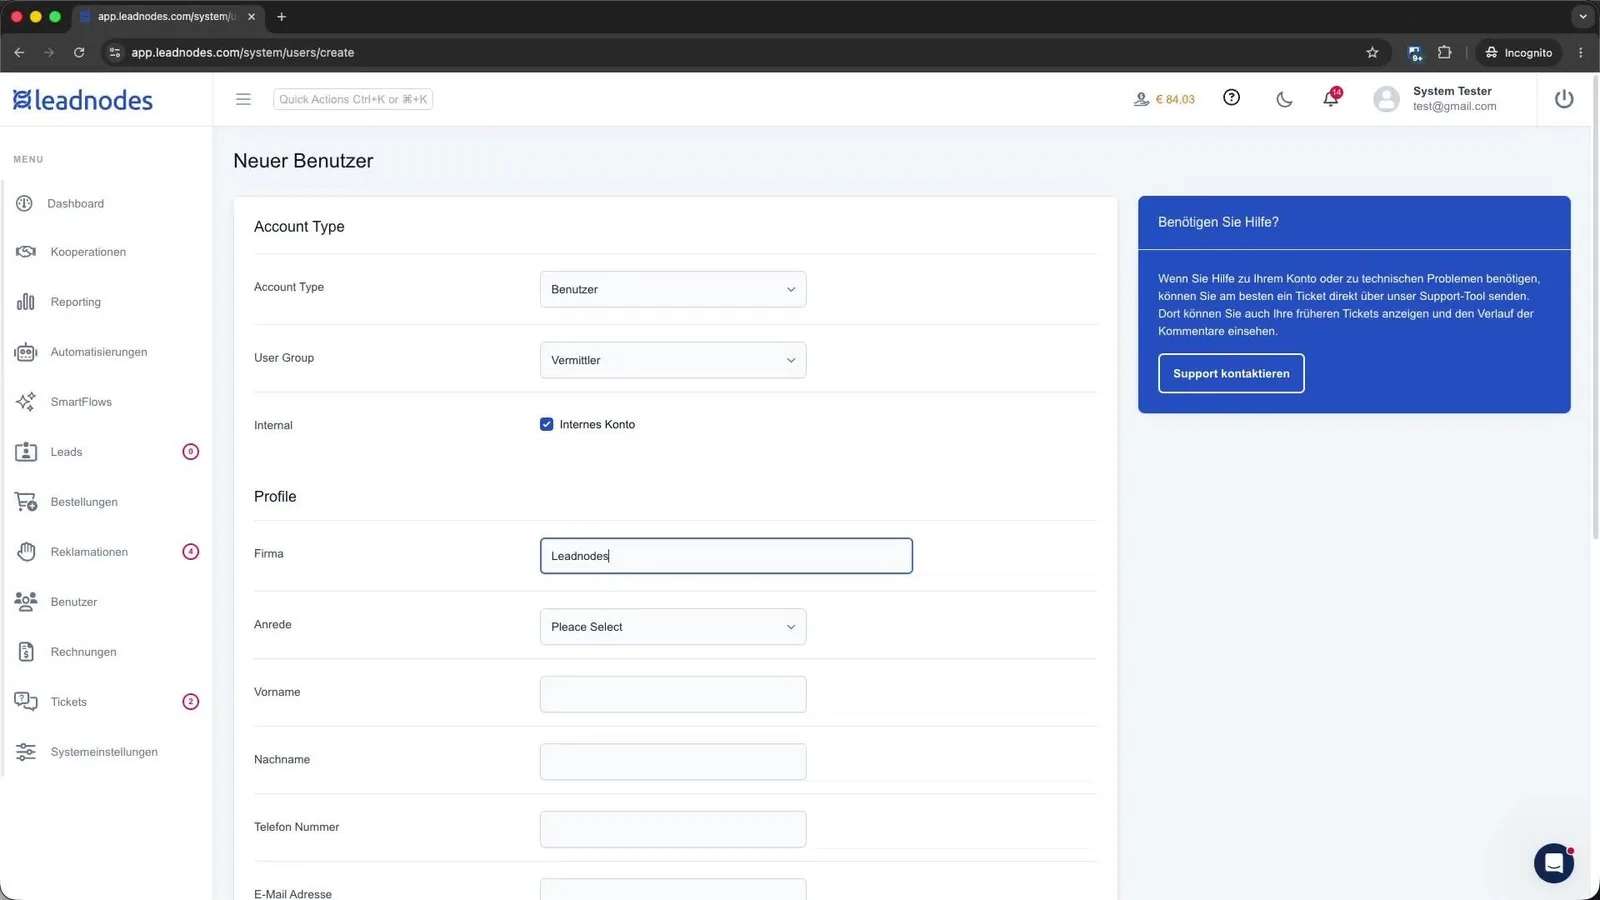
⚠️ Wichtig: Always verify the email address before saving the user. If a user provides an incorrect email address, they may later lock themselves out of their account, as they will not receive the necessary confirmation or password reset links.
Handling Salutations and Titles
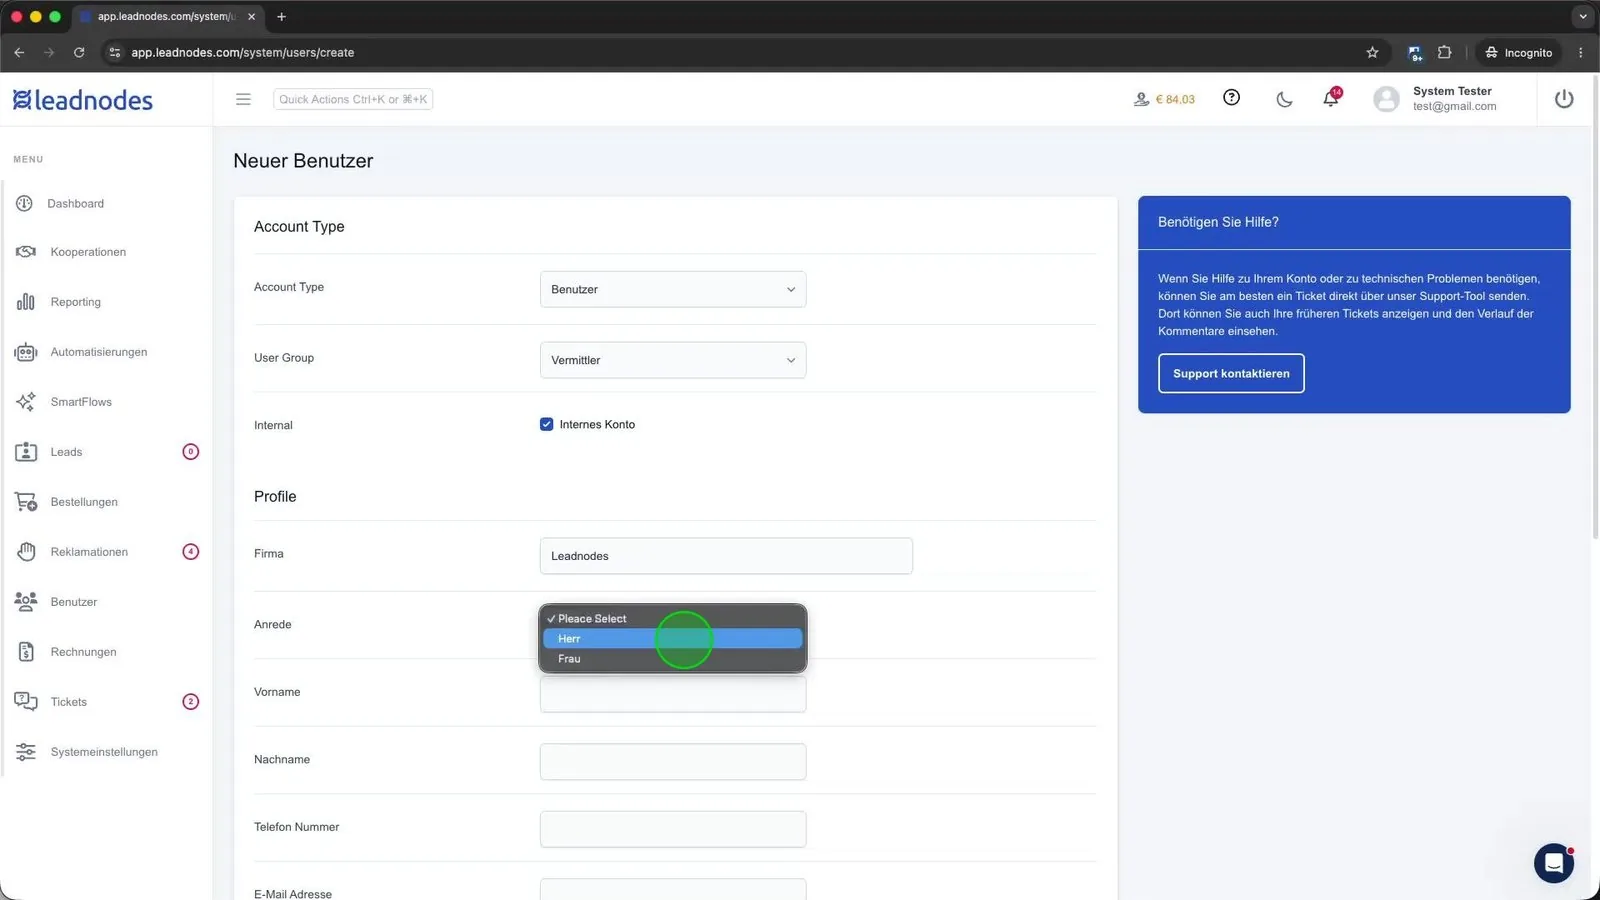
The salutation field allows you to select from common options like Mr. or Ms. Although this might seem like a small detail, it is essential for the quality of client interactions. Choosing the correct salutation ensures that any automated correspondence sent by your system maintains a professional and personalized tone.
Completing Name Entries
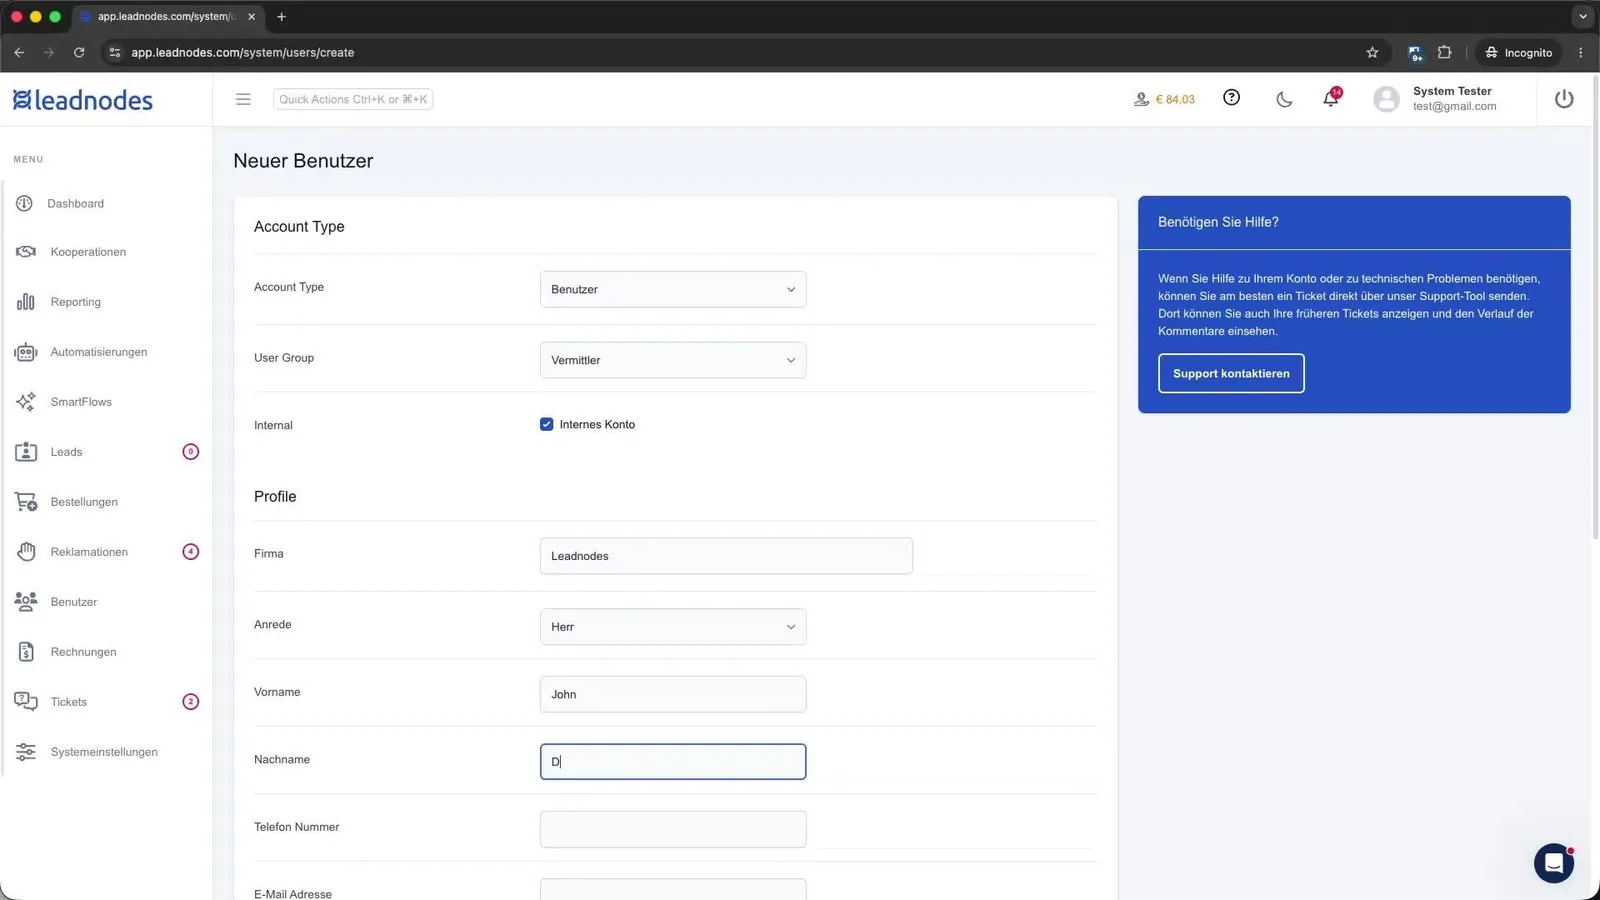
Finally, round off the contact profile by entering the first name and last name into their respective fields. Taking the time to fill out these details completely prevents ambiguity when searching through a list with many users. It is also advisable to ensure that the phone number is in a format that your team can easily read and use if they need to contact this user directly – whether for troubleshooting or business inquiries.
Setting Credentials and Finalizing the User
Once the profile details are stored, the final step is to determine how the user accesses the platform. This step secures the account and completes the user creation process.
Configuring the Username
In the User Credentials section, you define the unique username for the account. Since Leadnodes operates as a multitenant platform, simple or common usernames may already be taken by other users.
To increase the chances of your desired username being available, we recommend using a consistent naming convention – such as adding a prefix or suffix to the username. This strategy not only improves the likelihood of a successful registration but also helps you keep your system logs and user lists organized and uniquely identifiable.
Generating Secure Passwords
For the password field, you have two main options. You can either manually enter a password of your choice or utilize the system's security features by clicking the "Generate" button. Using the automatic generator is highly recommended, as it creates a high-entropy password that is resistant to brute-force attacks.
⚠️ Wichtig: If you generate a password, make sure to write it down or save it immediately in a secure password manager. Leadnodes does not store passwords in plain text. Once you leave or refresh the page, you will no longer be able to retrieve it. Login credentials are not automatically sent to the user via email.
Saving Your Configuration
After entering the username, setting the password, and verifying all profile information, click the "Save" button at the bottom of the page. This action officially creates the user record in the system.
Upon saving, the platform will automatically redirect you to the Detail View of the new user. Here, you can apply further advanced configurations – such as customizing specific permissions, setting up individual API keys, or fine-tuning access to specific lead types. Your new user is now ready for action.
Conclusion
Creating and managing users in Leadnodes is a straightforward process, provided you pay close attention to the assigned roles and permissions. By carefully selecting the right account type from the start and grouping users logically, you maintain a clean, organized, and secure system that grows alongside your business activities.
Remember that user creation is only the first step. Once a user is created, the Detail View serves as the central hub for ongoing management. Here, you can modify permissions, adjust settings, and make any necessary administrative changes. Properly managing your team's access helps you streamline workflows and ensures that everyone has exactly the level of access required to work effectively.
Frequently Asked Questions (FAQ)
-
Can I still change a user's account type after it has been created?
- Yes, you can adjust the account type and other user settings by accessing the user's profile within the system's administration panel. Keep in mind, however, that role changes can take effect immediately, impacting access levels and permissions.
-
Why is my desired username being rejected by the system?
- Leadnodes is a multitenant platform, meaning that usernames must be unique across the entire system. If a simple name like "John" is already in use by someone else, you will need to add a prefix, suffix, or another unique identifier to register the account.
-
Does the system automatically email the login credentials to the new user?
- No, the system does not automatically send login credentials. You must provide the username and password to the user manually and securely after the account is created.
-
What should I do if I forgot or lost the password that was just generated?
- Since passwords are not stored in plain text and cannot be recovered, you will need to use the platform's password reset feature. Always ensure you have saved generated passwords in a secure password manager before leaving the creation screen.
-
What is the main benefit of the "Internal Account" checkbox?
- The primary benefit is the exemption from billing. It ensures that internal staff members who process leads as part of their duties do not generate unnecessary invoices. This is useful when costs are covered elsewhere or handled externally.
-
How can I delete or rename an existing user group?
- You can manage your user groups by navigating to the System Settings and opening the User Groups section. From there, you have full control to rename, edit, or delete existing groups to keep your organizational structure up to date.
-
Can I assign a user to multiple user groups?
- The current user creation process typically involves assigning a user to one specific group for organizational clarity. Check your local system settings or documentation to see if your specific plan configuration supports multi-group assignments.