
This guide lets you set up the Reonic integration in just a few steps.
1. Select a user
First, select the user who is to receive the leads via Reonic.
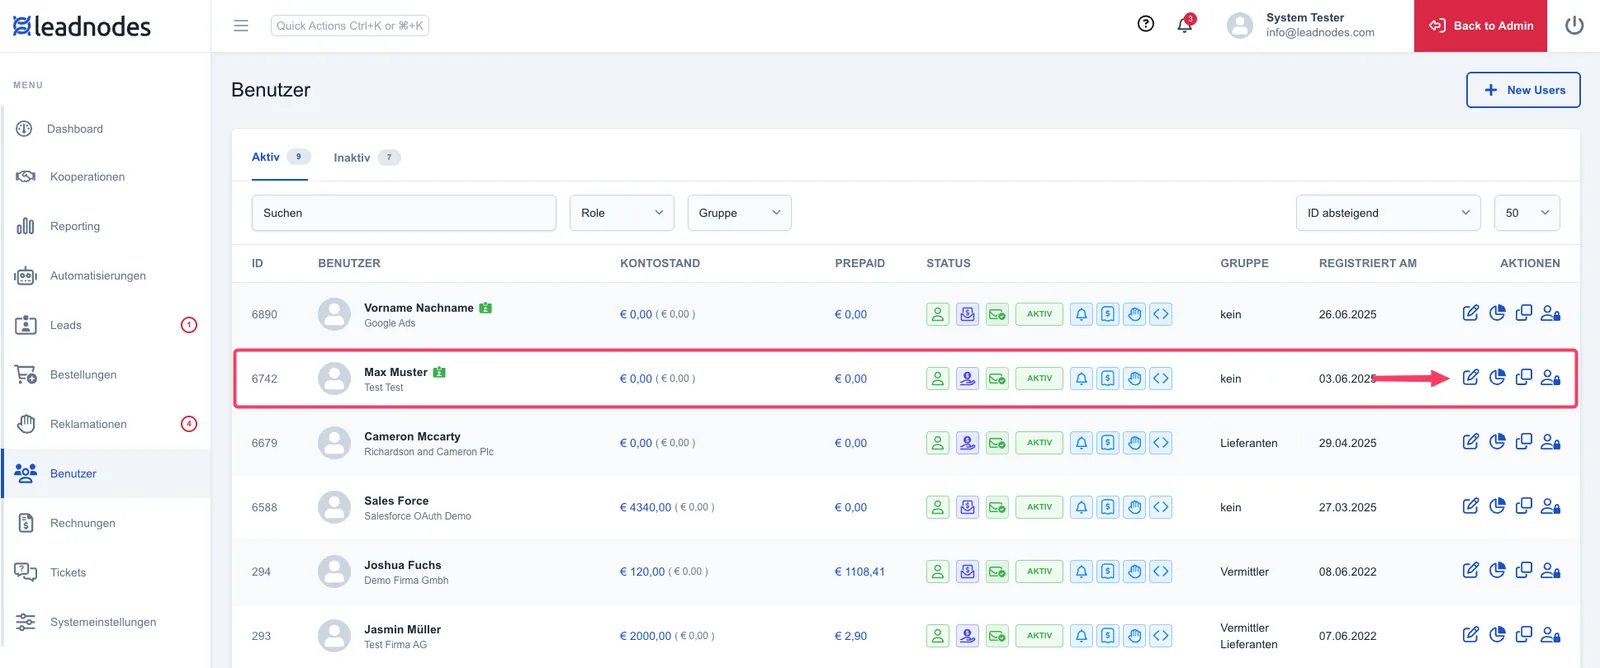
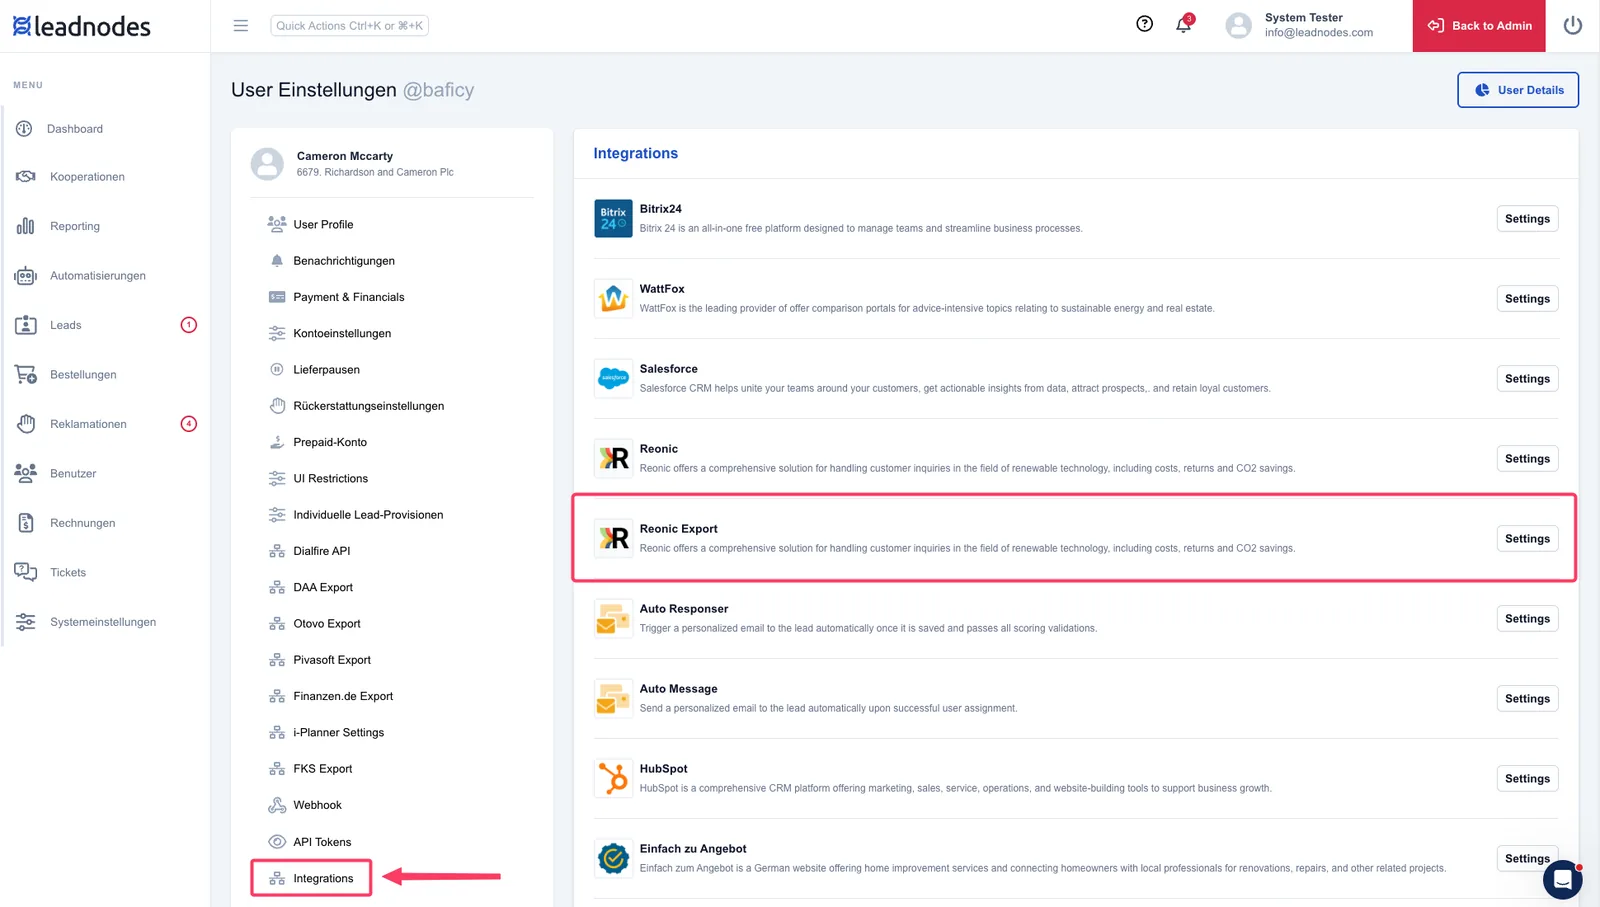
2. Open the integration
- Go to the Settings of this user.
- In the menu on the left, select the Integrations sub-item.
- Select the new Reonic export integration.
- Click Settings.
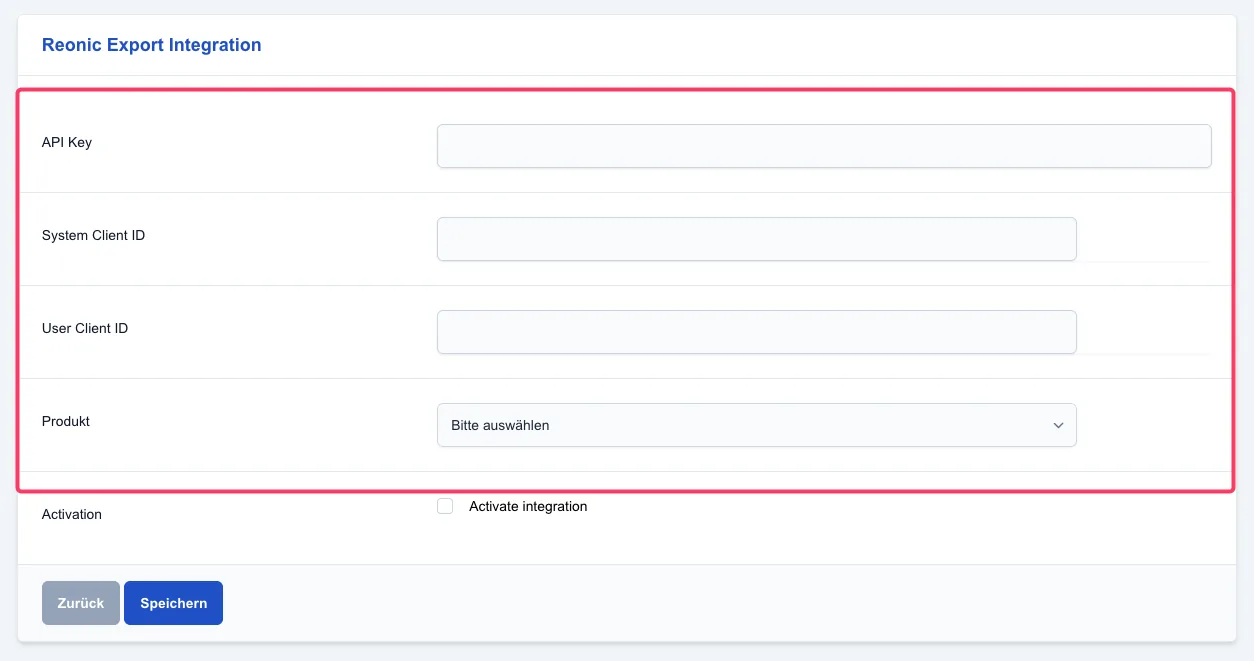
3. Required parameters
You need four parameters for the setup:
- API Key
- System Client ID
- User Client ID
- Product type (e.g. “Household”)
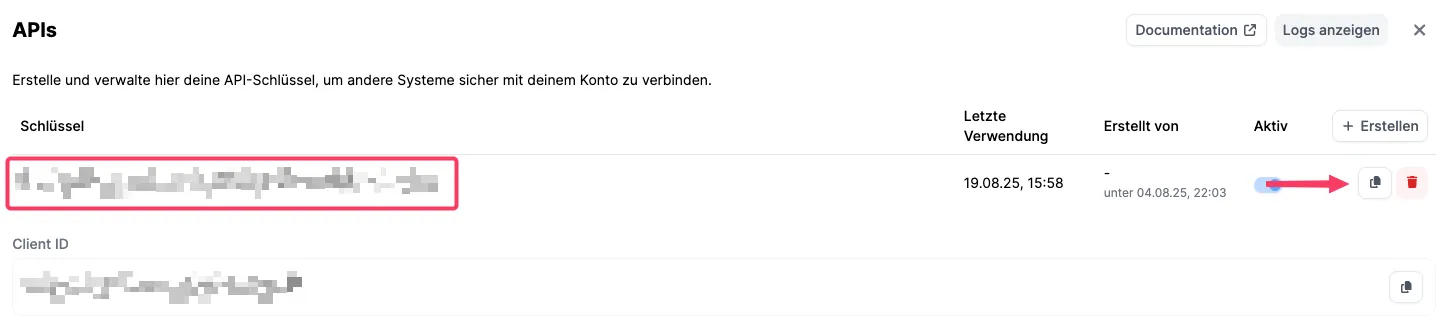
4. Retrieve the API Key
- In the Reonic system, open Settings → Integrations → API.
- Click Customise there.
- Copy the displayed API Key.
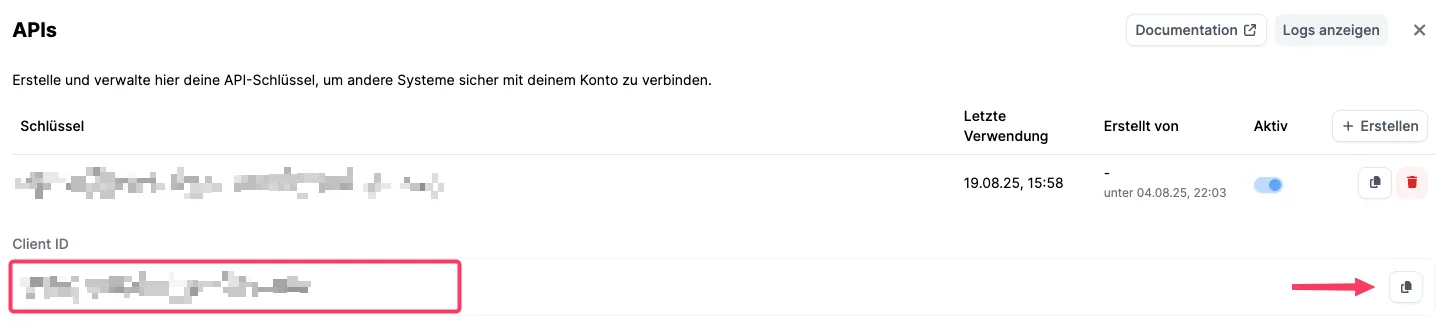
5. Retrieve the System Client ID
In the same place you will also find the System Client ID.
- You can also copy this directly via the button.
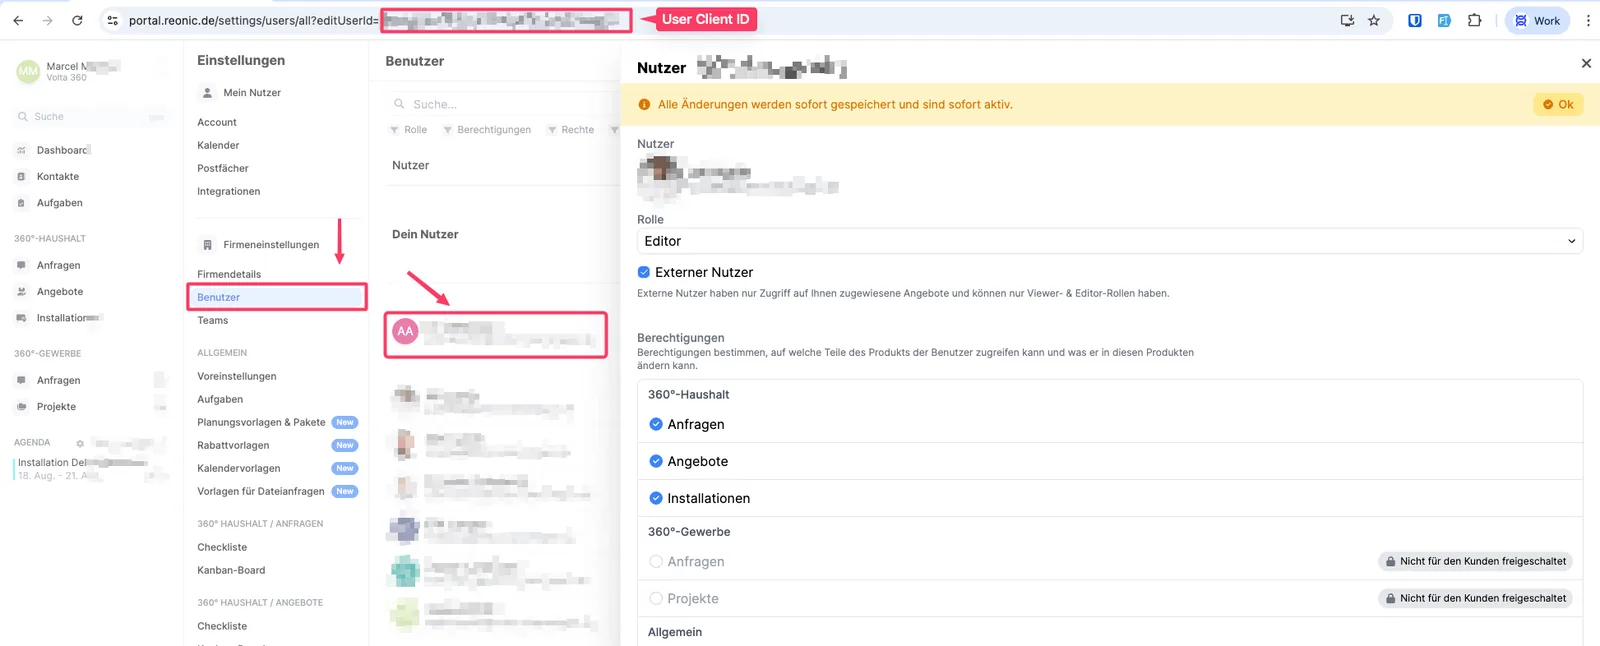
6. Determine the User Client ID
-
In Reonic, select the user who is to receive the leads.
-
Look at the browser address bar (URL):
- At the end, after the =, you will find the User Client ID.
-
Copy it and paste it into the corresponding field.
7. Select the product type
Finally, select the desired product type (e.g. “Household”).
Lead Source Name
In the latest version of the integration, a desired “leadSourceName” can now also be transmitted. It is then displayed as a source tag in Reonic. Important: the leadSourceName must already exist in Reonic and must match exactly the name entered in Leadnodes.
Done – your Reonic integration is set up!
The basic setup of the Reonic integration is now complete.
Standard data is mapped automatically.
Additional data appears in the Notes field of the request in Reonic.