
With the Leadnodes webhook integration, you can send leads to any webhook URL after assignment.
This documentation describes how to set up a webhook integration for the automatic transfer of leads to a specific webhook URL. The steps for configuring and activating the integration are explained in detail.
To set up the webhook integration, follow these steps:
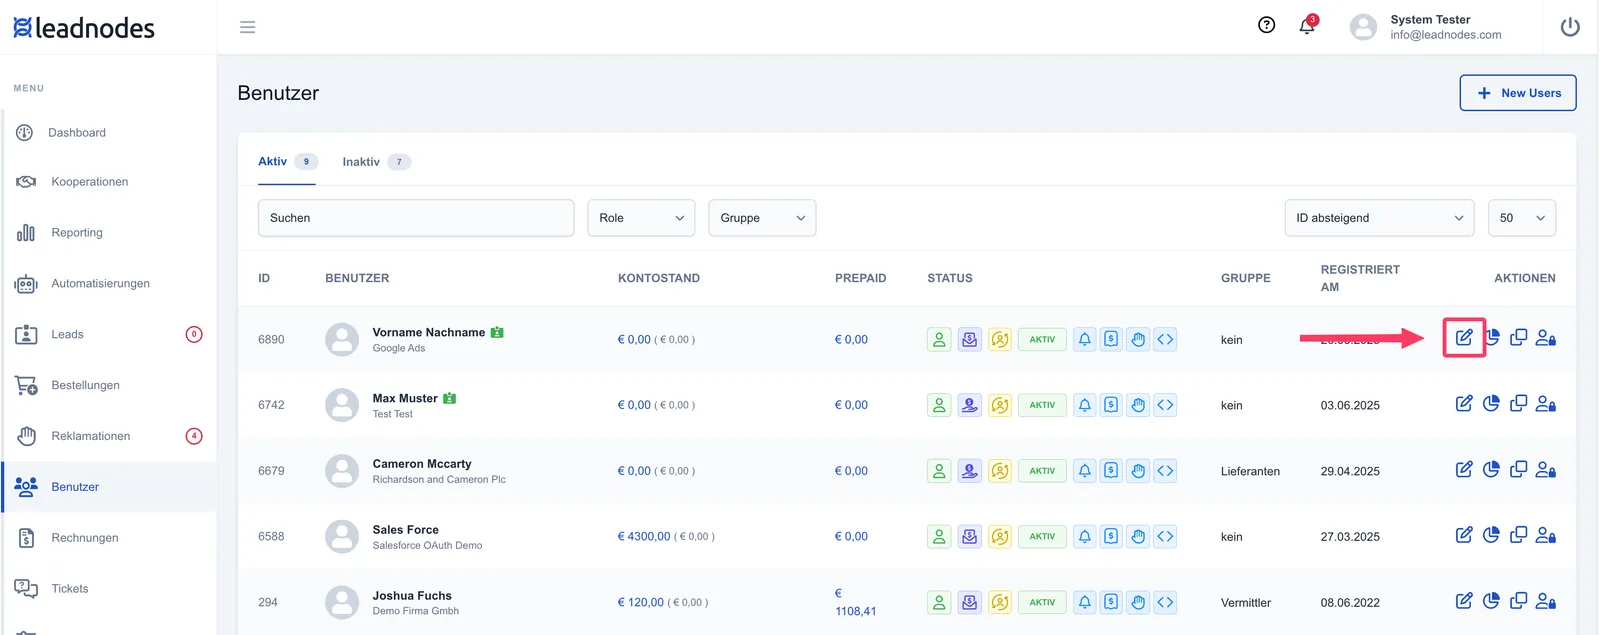
- Navigate to the user for whom you want to set up the webhooks.
- Click the pencil icon to edit the user.
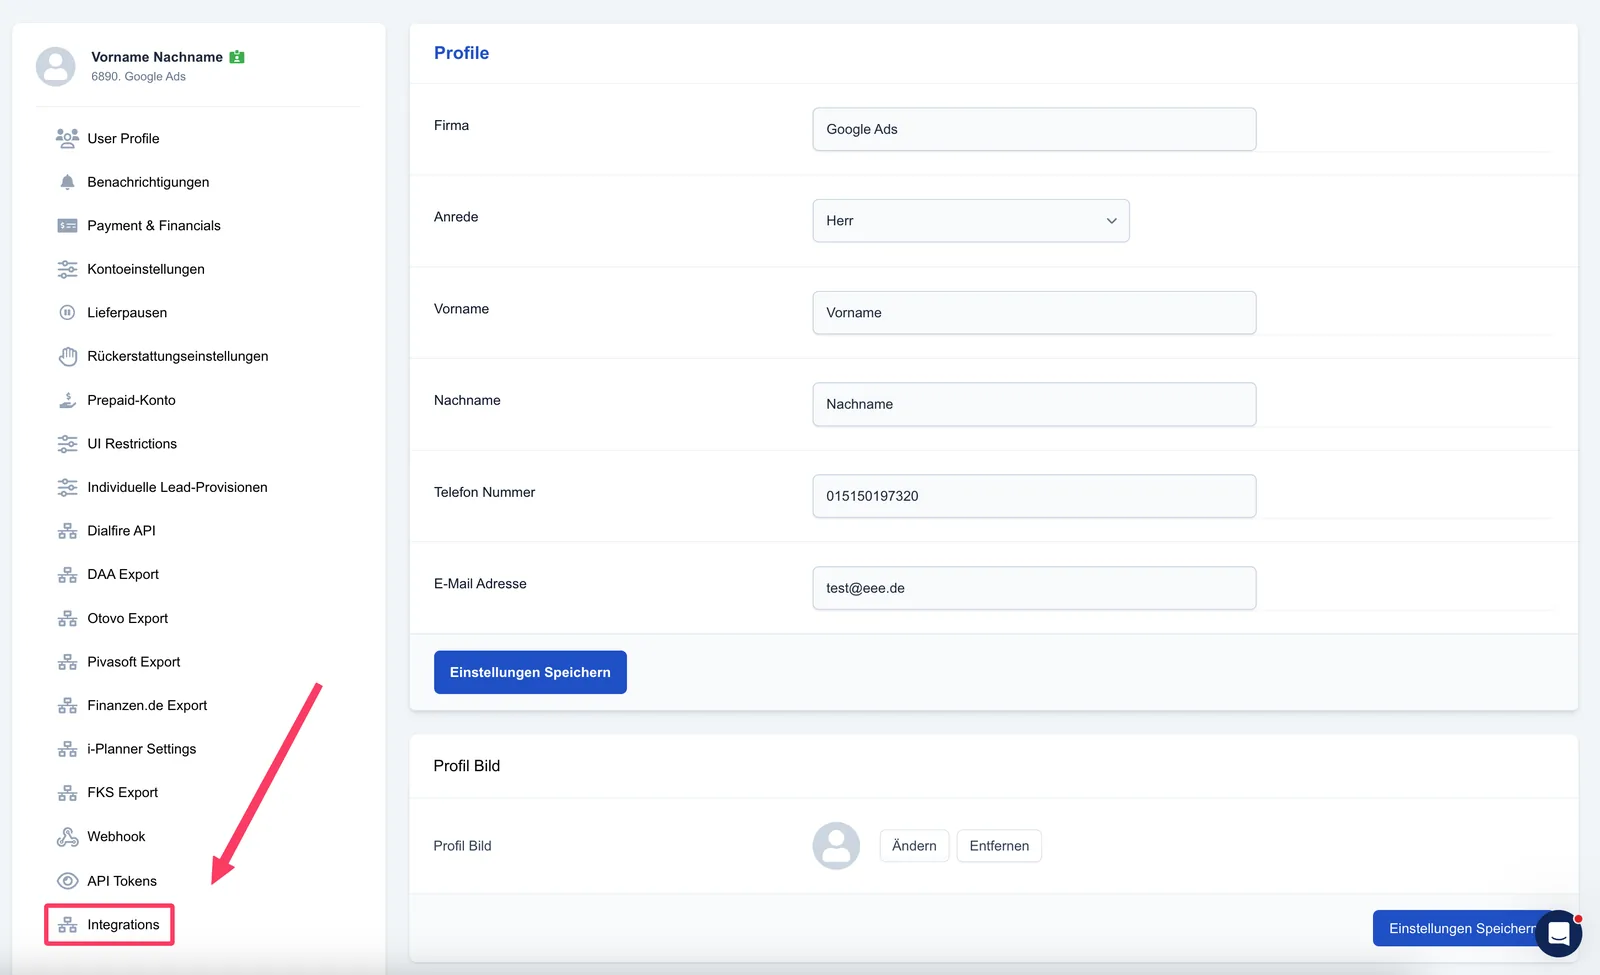
- Select the "Integration" item in the left-hand menu.
- Scroll down to find the "Webhooks" integration.
- Click the "Settings" button to make the necessary settings.

- Click the button to add a new webhook URL.
- Enter your webhook URL.
- Select from the dropdown menu whether the URL should be used for all lead types or only for a specific lead type.
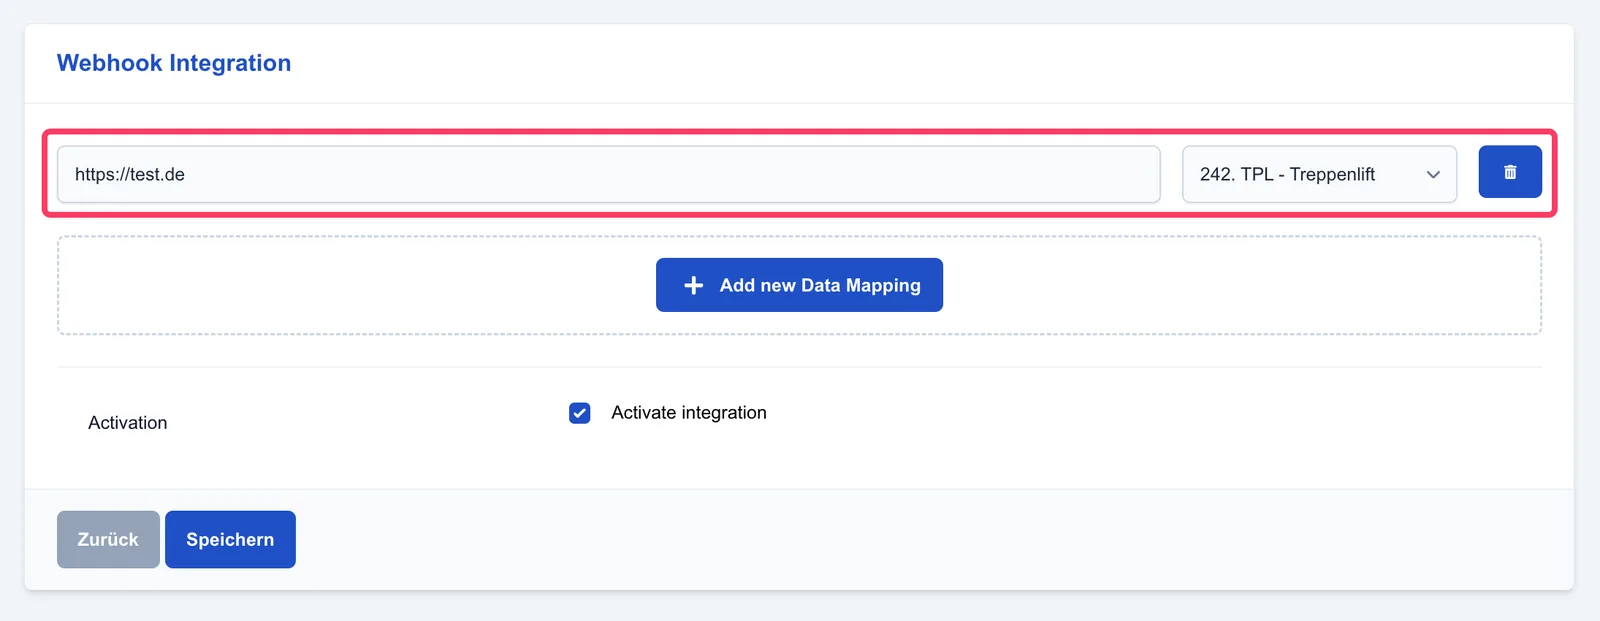
You can add any number of webhook endpoints to this integration to configure different URLs for different lead types.
- Activate the integration by ticking the "Activate integration" checkbox.
- Save your settings.
From now on, every time the user is assigned a lead, it is sent in parallel to the stored webhook URL.